
Prestige Student Management Systems
Opening the Day
After you power on and log in to Windows,

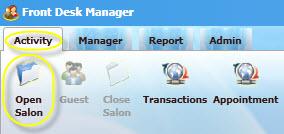
1. Open “Front Desk Manager” through the start menu or the desktop icon.
2. Once the program is opened, click “Open Salon” in the “Activity” tab in the upper left of the application.
Clicking open Salon will bring up a new window to enter your start of day information.

3. At the start of each day please enter the contents of the cash drawer.
a. In the “Count” column you will enter the actual number of each denomination into the space provided.
b. The “Cash Total” row toward the bottom will tell you the total amount entered into the drawer, the amount expected to be in the drawer, and the difference between those two. We start each day with $100 in the drawer.
c. The notes section can be used to note or explain any irregularities with opening your day. Please note the reason if the amount is different.
d. At any point you can click “Open Cash Drawer” to open the drawer and place the cash inside. You will be prompted to enter your employee ID to open the cash drawer.
e. Once you have entered the required values click “Open Salon” open the day and start checking in clients for services.
If the drawer is short please enter the reason for starting short.

Hit Save to exit the open salon function and return to the main screen of the Front Desk Manager.
Point of Sale Activities
The Activity Tab will be the primary tab for daily activity. The activity tab will allow for added guests, transactions, appointments and closing the salon.
To check in clients:

When clients come in you will check them in by clicking “New Ticket”. This will bring you to the “Search Guests” screen where you will need to either search for existing clients or create new guests.
Select Guests:
New Guests:
If the client is new or not in the database yet, you must select “New Guest” 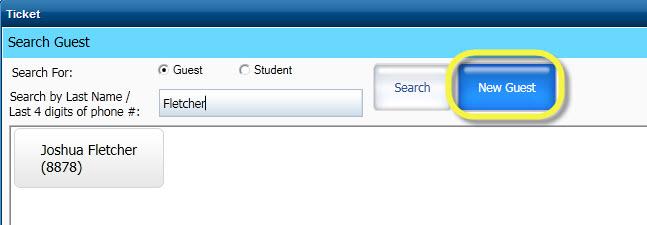

When creating a new client record, enter the client’s first name, last name, and telephone number for categorical reasons. We would like to collect E-mails as much as possible for clients for the newsletter and potential offers we may have in the future. You may enter any of the other optional information such as gender, birthday, address, and even a preferred stylist.
Once you have collected and entered this information you must hit “Save” in the lower left to save and enter this entry to the client database.
Returning Guests:
- If a guest is returning or has just been entered into the database search system by entering their last name or last four digits of their telephone number. The results of the search will appear directly below the search bar.

Selecting Services:
Once you click the client name from the search results, more detailed information for the client will appear to the right. Verify you have the right client and continue by pressing “Next” in the lower right.
In the next menu you will be entering which services the client is looking to have done.
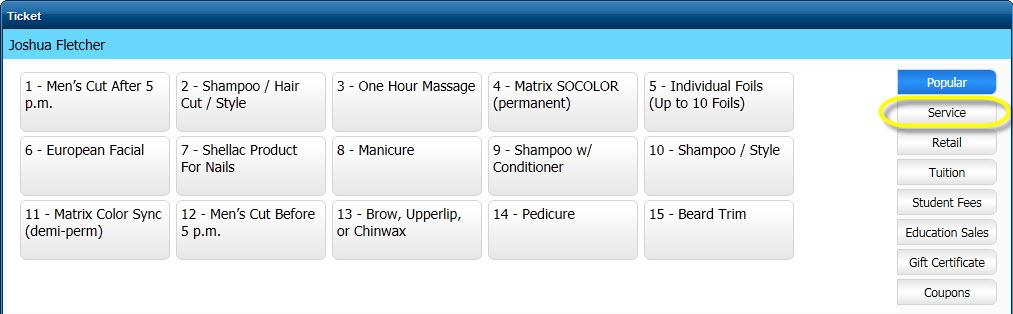
- The most common services will be located at the top, but you can search for anything not listed here by clicking “Service” in the upper right. You can click on the service buttons to add them to the client’s ticket below. Services are categorized as they are in the brochure
- After clicking the service button there will also be options for student, employee, and family services.
- Once you’ve added their services, you can click “Check In” in the lower right to continue.
The check in feature is essentially a virtual waiting room. This is the listing of all the clients that have shown up and are waiting for services. This will list everyone waiting and how long they have been waiting for service.

When a client is ready for service, they need to be moved to In-Service.

4. When the student is ready for the client, select “In Service” which will bring up a prompt consisting of all the students currently clocked in. Select the student taking the service and click “OK”.

- Once you select the student to perform the service the system will display a pop up asking if you like to print a ticket, select “Yes”. This will be the service sheet that the student must have the teacher sign off on upon completing the service.
- The client will be moved from the “Wait List” to “In Service”. The “In Service” window will tell you which clients are currently being worked on and how long they have been there.
Check out clients:
Once the student has completed the service and brings the client to pay, you will select the clients name from the “In Service” window and click “Check Out” in the bottom right.
At this time you can select the client and click “View/Edit” below the “Wait List” to edit the services they want if need be


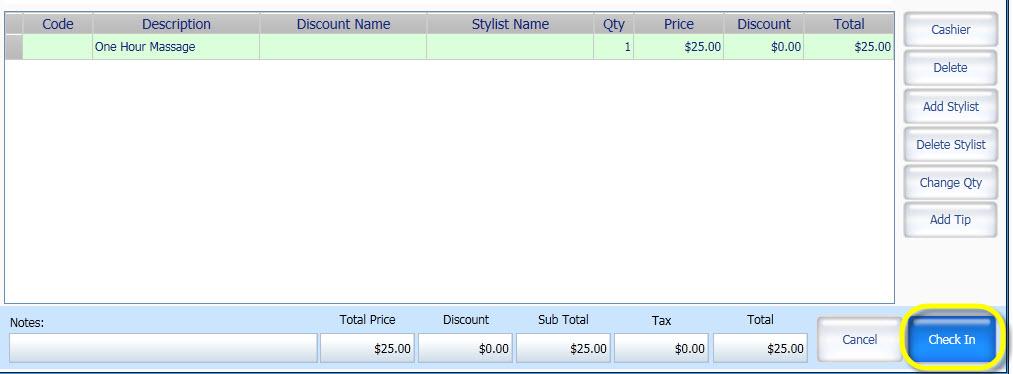
7. This brings you to the “Ticket” screen, similar to when you checked the client in. Here you can edit the services if the service they ended up receiving differs from the services they requested.
You can add services the same way as before and remove them by selecting it in the bottom window and clicking delete to the right of that window.
8. Once the ticket matches what the client received you can view the total and click “Payment”, both in the lower right.

9. At this point, if they are paying with cash, you can enter the amount given in the allotted space.
Discounts can be entered here with a reason explaining why by clicking the “Discount” button on the right side of the prompt above. Discounts can be entered by either entering the adjusted price, amount of the discount, or the discount percentage.

If they are paying with check, debit, credit, gift card or certificate, you will select the “Others” option from the payment screen.

From this prompt, you will select which payment type they are using from the list provided. Click on the payment type and include the corresponding check number, credit or debit invoice number, or the certificate number in the “Number” field located to the right.
TIPS- If the client would like to add a tip to their total with any of these payment types, just add the tip amount to the amount due from the service and put that total into the “Amount:” field.
Once you have entered the invoice/check/gift number and the “Amount” total into the proper fields, you can click “Save” to finalize that transaction with Front Desk Manager.
10. This will then display the change to be given, as well as print a customer and salon copy of the receipt.
*The client will automatically be removed from the “In Service” list after payment.
Closing the Day
1. At the end of your shift, or the end of the day, you will close the salon and cash drawer. To start this process, click the “Transactions” icon in the upper left of the screen
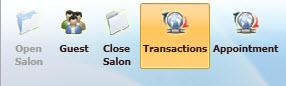
2. From here you will print this detailed report that lists your transactions for the day by clicking print in the lower right hand corner of the screen.
This report will be included in your end of day envelope.

*This list will include people in the “In Service” list if any are still there. If you are closing out for the day shift, please be sure to mark the clients still in service on this printed report.
3. Once you have printed the Transactions you can now click the “Close Salon” tab located in the upper left of the screen
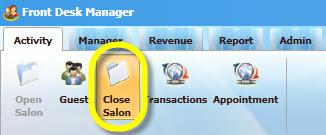
The “Close Salon” window will be very similar to the one used to open the salon. Here you will enter ALL of the contents of your cash drawer into the appropriate locations.

4. Once you have entered everything into the correct locations you can click “Close Salon”
5. Remove one hundred (100) dollars from the end of day and place it back in the banker’s bag or drawer for the next person to start their day or shift.
6. Collect the printed reports and all the remaining contents of the cash drawer and put them in a sealed envelope with your name, date, shift information, and what time the envelope was sealed on the outside.
7. Place the envelope in the safe to be collected for the business office.