
Prestige Student Management Systems
PROCESS FOR AUTOMATED SPARKS
Introduction:
Instant Alerts are a quick method to send or notify a student or staff member of an upcoming event, school closure or any other communication that you wish to create. Automated sparks is a method to set up auto emails or text for leads, grads, or students.
Before creating an automated spark you will need to create an instant alert.
INSTANT ALERTS
- UNDER THE “COMMUNICATION TAB”
- In left column under
 click on “Instant
  Alerts.”
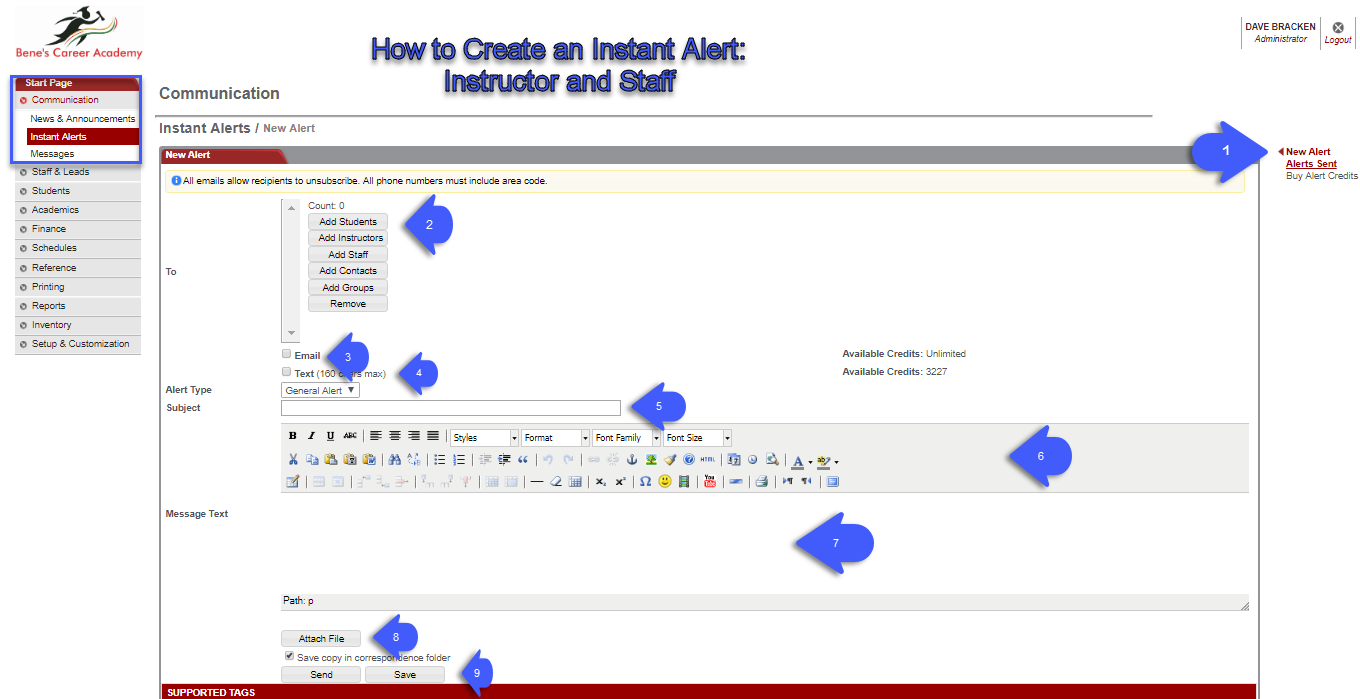
- 1.Click on “New Alert” in right column under “Instant Alerts”.
In the “To” portion of the screen you will find gray “field boxes” labeled with the groups you may want to send your “Instant Alert”. Click inside the correctly labeled gray “field box” or boxes to choose who to send your alert. You may also filter your selection to select which campus you would like to target if you have multiple campuses.
- 2. EXAMPLE: “ADD STUDENTS”, at the top of this screen. Your “Departments” (programs) will be listed so you may select one or all of your students in that particular program. Here also you may choose to select a group of students or search for a student by last name by accessing the “alphabet” bar at the top of the screen.
- 3. Choose which type of “Instant Alert” to send, either “Email” or “SMS” (text) message.
- 4.*If you choose “Email”, formatting and design options are available.
- 5. Type the subject of your message here.
- 6.There are many design and formatting options available to use to make your message as simple or as elegant as you wish.
- 7. Type the content of your message here.
- 8. “Attach File” allows you to browse and attach any type of file in your computer that you wish to your “Instant Alert”.
- 9. “Save Copy In Correspondence Folder” check mark this box if you wish to save your newly created “Instant Alert”. Click on “Send” to publish your “Instant Alert”.
AUTOMATIC SPARKS
How do they work?
Think of sparks as your automated helper - you give it a set of conditions to look for and a task to execute, and the system will execute that task when the the conditions are met.
The system will check these sets of conditions every hour, and it will perform actions when the set of conditions for a spark has been met.
To build a spark, ask yourself 3 questions: Who? What? When?
- Who is the subject of the spark? Sparks can be built for either students or contacts.
- What happens when the spark is executed? This is the action (task) you’re looking to perform.
- When is the spark going to execute? This is where you list the conditions that must be met in order for the system to execute the task.
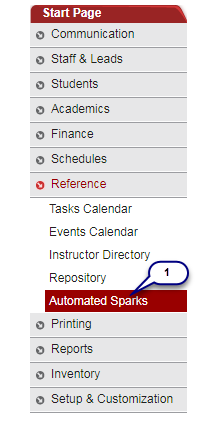
- UNDER THE “REFERENCE” TAB
- In left column click on “Automated Sparks”
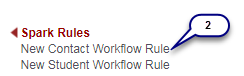
New Contact Workflow Rule
- In right column click on “New Contact Workflow Rule”
(for prospect or customer contacts)
- Create a “Rule Name” (Example: New prospect Catalog)

When this Happens:
- Add “Condition”
 (This is a trigger for when X occurs send message to Y to contact Z)
 - Select “Data” (Where you want the info to pull from)
- Select “When This Happens” (equal or not equal)
- Select “Value” (type of contact your sending message to)

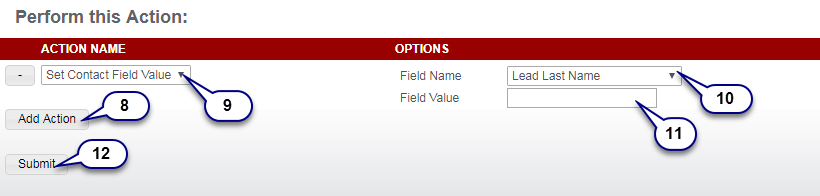
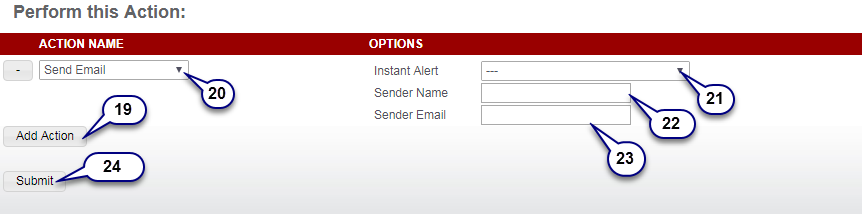
Perform this Action:
- Add “Action”

- Select “Action Name” This the action you wish to occur. (Example: Send Email)
- Select “Instant Alert” This is the Instant alert you wish to send.
- Type “Sender Name”
- Type “Sender Email”
- Click “Submit”

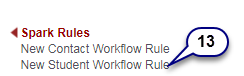
New Student Workflow Rule
- In right column click on “New Student Workflow Rule” (for student sparks)
- Create a “Rule Name” (Example: New prospect Catalog)

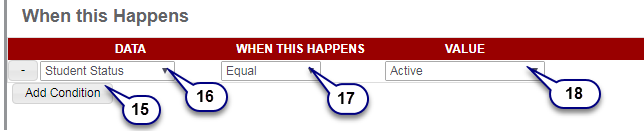
When this Happens:
- Add “Condition”
- Select “Data” (Where you want the info to pull from)
- Select “When This Happens” (equal or not equal)
- Select “Value” (type of contact your sending message to)
Perform this Action:
- Add “Action”

- Select “Action Name” This the action you wish to occur. (Example: Send Email)
- Select “Instant Alert” This is the instant alert you wish to use (Example: New prospect Catalog)
- Type “Sender’s Name”
- Type “Sender’s Email”
- Click “Submit”
Basic Example:
Let’s say you want to send an alert to students when they’re nearing graduation. Start by answering the three questions:
- Who - Students who meet the criteria
- What - Send an email/instant alert to the student
- When the student has reached 700 hours (I’m just using 700 as an example)
Note: You can add as many “Conditions” and “Actions” needed for each Automated Sparks.
Successfully Building a Spark
Here’s an old programming joke:
A husband tells his wife “Honey, I’m going to the store. Do you need anything?”
His wife responds, “Please buy a gallon of milk. If they have eggs, get a dozen.”
And the husband comes back with 12 gallons of milk!
If you understand this joke, then you’ll easily grasp how to build sparks. The system will do EXACTLY what you tell it to do.
Let’s look at the example above. The system was given one very specific condition: students at 700 hours will receive an email. It seems straightforward, but this probably won’t work out the way we expect it to. Let’s examine who will and who will not receive the message.
- Matt is an active student, and one day he accumulates exactly 700 hours. That night, he receives a message about his graduation eligibility!
- Johnny clocked out yesterday, and his attendance added up to 701 hours. He will not receive the graduation message. He isn’t at exactly 700 hours, so the system doesn’t believe he’s met the criteria. (As a matter of fact, he could have 700.5 hours and the same thing would happen).
- Alice graduated two years ago with exactly 700 hours. Even though her student status is marked as “Graduated,” she’s still in the system as a student. She will receive the graduation eligibility message, even though we know she doesn’t need one!
- Lorena dropped out of school last week with exactly 700 hours. Even though her student status is “Withdrawn,” she’s still a student, and she will receive this message.
Automated sparks are powerful, but they don’t have the ability to make judgement calls the way a human can. It’s easy for us to see that a graduated or withdrawn student should not receive an alert about graduation, but we need to give this information to the system as well!
Let’s change our spark to be a little more specific:
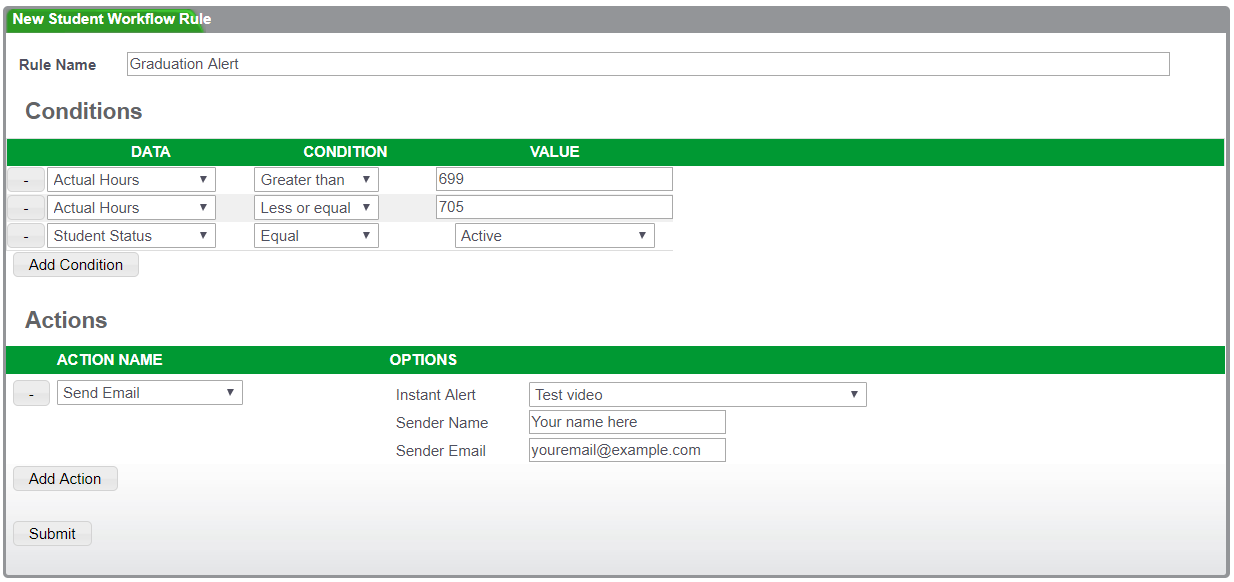
Here’s what we changed:
- Instead of looking for students with exactly 700 hours, we’re telling the system to look for students who have accumulated between 699 and 705 hours. Students with “Actual Hours” anywhere in this range will meet the criteria.
- We added a condition to only include “Active” students.
Now, Matt and Johnny will receive the alert, but Alice and Lorena will not. Alice and Lorena still meet the hours criteria for this spark, but their student statuses are not “Active,” so they will not receive the message.
Understanding “Conditions"
Conditions are the “when” of sparks, and you can add as many conditions to a Spark as you need. An easy way of figuring out what conditions you want to include is to say it out loud to yourself. Be as descriptive and thorough as you can.
Let’s say you wanted to automate your contact handling process by sending an email to each new contact, then set their contact status to “2. Left Message.” Both of these actions can be handled in a single spark!
To decide what conditions to use in this case, you might say to yourself “I want to send a message to a new contact as soon as he/she was added to our system.” We can identify 2 conditions from this sentence, then translate them into rules that the system can understand.
|
|
Plain English |
DATA |
CONDITION |
VALUE |
|
1 |
“new contact” |
Lead Type |
Equal |
1. New Contact |
|
2 |
“as soon as he/she was added to our system” |
Days Since Last Status Change |
Less than or equal to |
1 |
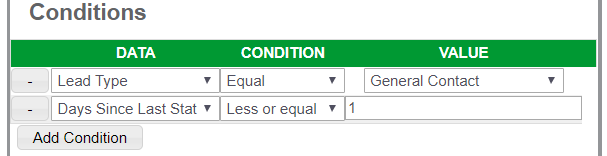
Entered in the system, it looks like this:
Here’s what you’ll see when you click on each drop-down menu.
- DATA: This will display a list of all of the fields in the contact’s record page (if you’re creating a Student Workflow Rule, you’ll see a list of the fields in a student’s record page).
- In our example, the first condition uses a record’s Lead Type. When the system checks whether a contact meets this criteria, it will pull that piece of information from the contact’s record page.
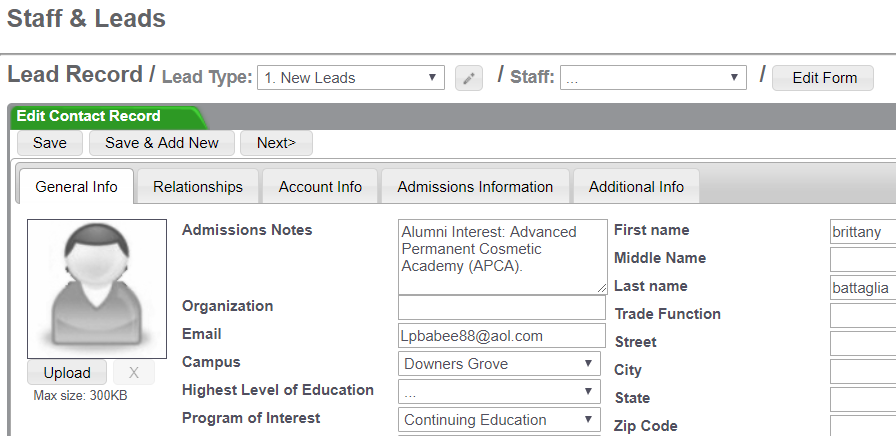
- From the picture, we can see that the system will see this Brittany’s Lead Type as “1. New Leads.”
- CONDITION: This will display a list of how you can compare the values between the DATA and VALUE columns. You can read this out loud to yourself as a sentence. If the sentence is TRUE, the system will say “yes, this contact meets the condition” and it will perform the action in that spark for that contact.
- Equal: TRUE if the value pulled from the contact’s record for the DATA field is the same as the the value in VALUE
- Not equal: TRUE if the values in DATA and VALUE do not match
- Empty: TRUE if there’s no value in that field (it’s empty)
- Not empty: TRUE if there is a value in the field (doesn’t matter what the value is)
- Greater than: TRUE if the value in DATA is bigger than VALUE
- Greater than or equal to: TRUE if the value in DATA is either equal to or bigger than VALUE
- Less than: TRUE if DATA is smaller than VALUE
- Less than or equal to: TRUE if DATA is smaller than or the same as VALUE
- In: TRUE if the value in DATA matches one of the values in VALUE*
- Not in: TRUE if the value in DATA does not match any of the values in VALUE*
- VALUE: This is where you specify a value for the system to check against.
- Depending on what kind of DATA you selected, you may be presented with a drop-down list, or an empty box to fill in a value.
- * In the special cases of “In” and “Not in,” you can write a comma-separated list of values (eg. value1, value2, etc.) for the system to check against.
Example: Brittany
Using Brittany’s contact record from above as an example, let’s suppose she was added to the system 3 days ago. Here’s how the system will evaluate her information using the conditions.
|
|
DATA |
CONDITION |
VALUE |
Brittany’s Data |
Evaluation |
|
1 |
Lead Type |
Equal |
1. New Contact |
1. New Contact |
Is Brittany’s lead type equal to “1. New Contact?” TRUE |
|
2 |
Days Since Last Status Change |
Less than or equal to |
1 |
3 |
Was Brittany’s last status change 1 day ago or less? FALSE |
In order for a contact to be sent a message, each of these conditions must evaluate to TRUE. Brittany will not receive this message because she’s been in the system for longer than a single day with no status changes since then.
Understanding Actions
Actions are the “what” of Sparks, and you can add multiple actions to a single Spark. There’s a variety of actions a Spark can perform, and you can pull up the list by clicking the drop-down menu under “ACTION NAME”. Let’s look at what they are.
- Set Contact Field Value: Automatically update a contact’s record with the value you provide.

- Like the values in the DATA column, the drop-down list contains all the fields in a contact’s record.
- In this example, we’re automatically filling in the “Campus” field on a contact’s record with “Tampa.”
- (for a Student Workflow Rule, this will be “Set Student Field Value”)

- Set Contact Type: Automatically update a contact type with the value you provide.
- In this example, we’re filling in “2. Left Message” for the Contact Type.
- The student option is “Set Student Type”
- Send Email: Send an Instant Alert to a contact using the specified Sender Name and Sender Email address.
- Send Text: Same thing as “Send Email,” but uses SMS.
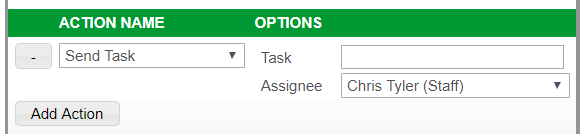
- Send Task: Enter a custom task and select a member of the staff to assign it to.
In our example, we said we wanted to send an email to new contacts, then change their status to “2. Left Message.” It’s easy to see how automating these steps will save you a lot of time! When we fill in the actions for the Spark, the final product will look like this:

Prestige School Management Systems