
Prestige Student Management Systems
HOW TO ADD AN INSTRUCTOR
Introduction:
The purpose of this function is to be able to easily add a new instructor to your database and have all of their relevant information at your fingertips.
Location in Prestige:
- Under “Staff & Leads” in left side bar.
- Click on “Staff Records” Click on”Instructor Records” In left side bar.
Let’s Try An Example!
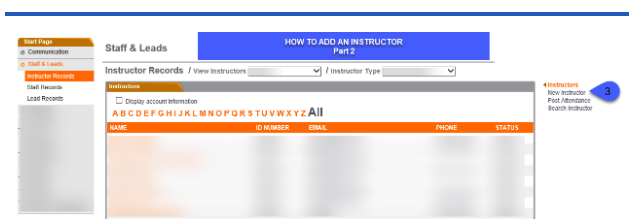
- 3.Click on “New Instructor” in right side bar.
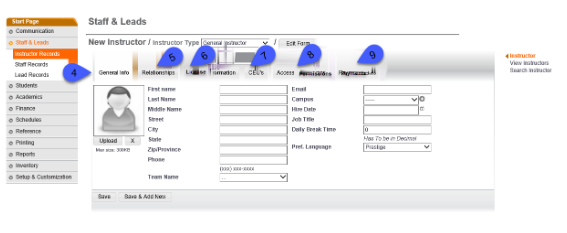
*There are six tabs at the top of this screen, definitions of each are as follows:
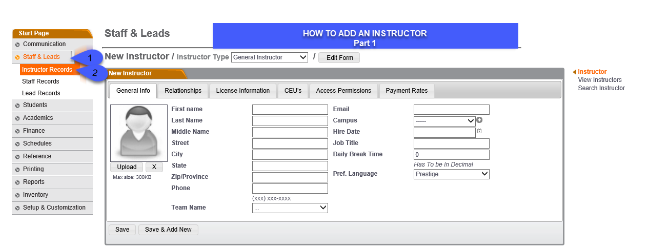
- 4. *Click on “General Info” - information such as name,Click in the “First Name” box, type the instructor’s first name. Complete this screen by clicking in the field boxes and typing in the relevant information address,phone,email,for each instructor are added here.
- NOTE: The “campus” field box has a drop down box with an arrow to select your campus if you have multiple campuses and if it is pre-populated. If not, click the “plus sign”+ to add your campus information.
- Click on “Save” at the bottom of the screen to save the information, or “Save & Add New” to save the information and add new information such as another instructor.
- 5. Click on *”Relationships” - here you may add students, instructors,contacts and staff to each instructor that they may have a “relationship” with.A list of selections such as “Add Students”, “Add Instructors’, “Add Contacts”, and “Add Staff” will appear. Each of these selections is pre-populated.Click “Add Students”. A pre-populated list of all of the students that has been entered into the system appears. You may select a specific student or students by check marking the box next to the student’s name or select all students that have a “relationship” with this particular instructor or staff member.
- Click on “Save” at the bottom of the screen to save the information, or “Save & Add New” to save the information and add new information such as another instructor.
- 6. Click on*“License Information” - professional license information is entered for each instructor. You may “upload” the license to a file on your computer.
- 7. Click on*“CEU’s” (Continuing Education Units) - continuing education information such as title of event, number of hours, and image of the continuing education certificate is able to be uploaded by browsing the files on your computer to save it to.
- Click “Save” to save your selections or “Save & Add New” to save your selections and add a new record.
- Payment Rates” No information need be added here.
- Click “Save” to save your selection or “Save & Add New” to save your
- selections and add a new record.
- 8. Click on “Access Permissions” here you may determine the type and level of access you wish to grant to the new instructor.
- 9. Click on “Payment Rates” here you may or may not choose to enter the rate of pay for the new instructor.
- Click “Save “ or “Save & Add New” to save your selection.